Moon Avoidance
Moon Avoidance helps AstroManager decide whether a filter is still worth using under the current moon conditions.
Primary Use Case
The main use case is to assign a moon avoidance profile inside Exposure Templates.
That way, the imaging goals created from those templates already carry the moon-related filter logic you want AstroManager to use later for planning and scheduling.
System Default Profiles
AstroManager already includes system-default moon avoidance profiles for the most common setups:
LRGBHa / SIIOIII
These built-in profiles cover the usual standard cases and cannot be changed.
Custom Profiles
If the defaults do not match your workflow, you can create custom moon avoidance profiles.
These custom profiles can also be selected in Exposure Templates, so they become part of your reusable imaging setup.
How The Profile Works
A moon avoidance profile defines how much distance from the moon a filter should require depending on the current moon illumination.
At full moon, the required distance is largest. As the moon becomes darker, the required distance becomes smaller.
AstroManager uses a Lorentzian-style curve for that calculation.
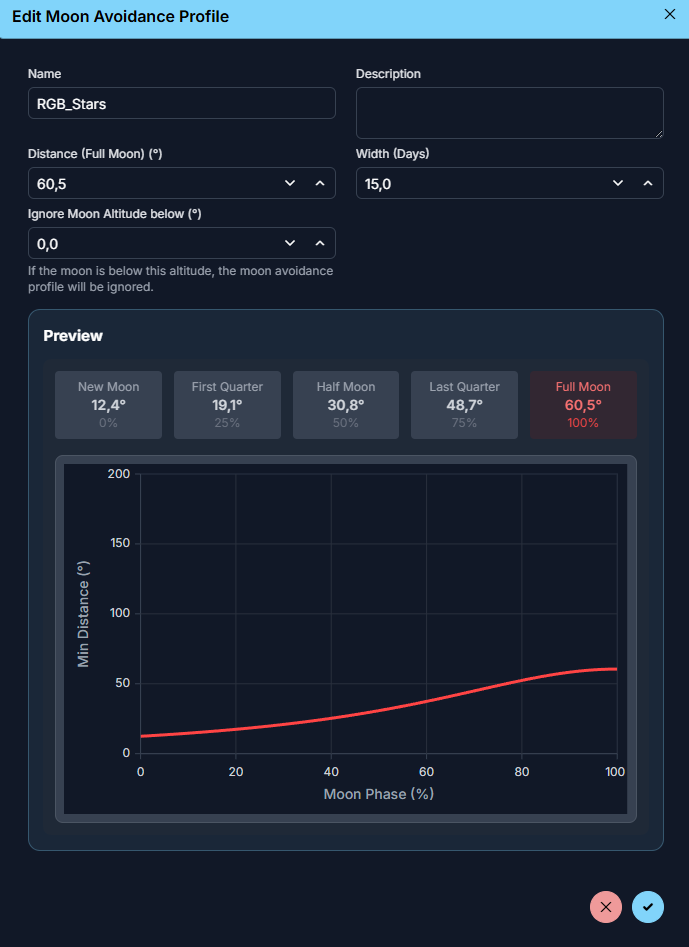
Profile Parameters
Distance Full Moon
Distance Full Moon is the required moon distance at 100% moon illumination.
This is the maximum avoidance distance the profile will ask for.
Example: If this value is 30°, the filter needs at least 30° separation from the moon at full moon.
Width (Days)
Width (Days) controls how quickly the avoidance distance falls off as the moon moves away from full moon.
- a smaller value means the profile stays strict mainly close to full moon
- a larger value means the profile remains more cautious across more of the lunar cycle
So this parameter controls how broad the "danger zone" around full moon should be.
Ignore Moon Altitude Below
Ignore Moon Altitude Below tells AstroManager to ignore the moon completely once it is below that altitude.