Target Management
You reach this page from the Targets tab inside the page Remote Control
What You Can Do Here
On this page you can:
- review and check the status of all targets of a client
- group and filter them
- change their data and imaging goals
- configure mosaics
- review progress and captures of these targets
Views And Navigation
The page includes dropdown actions to change the view or add additional targets directly from here
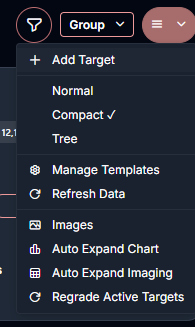
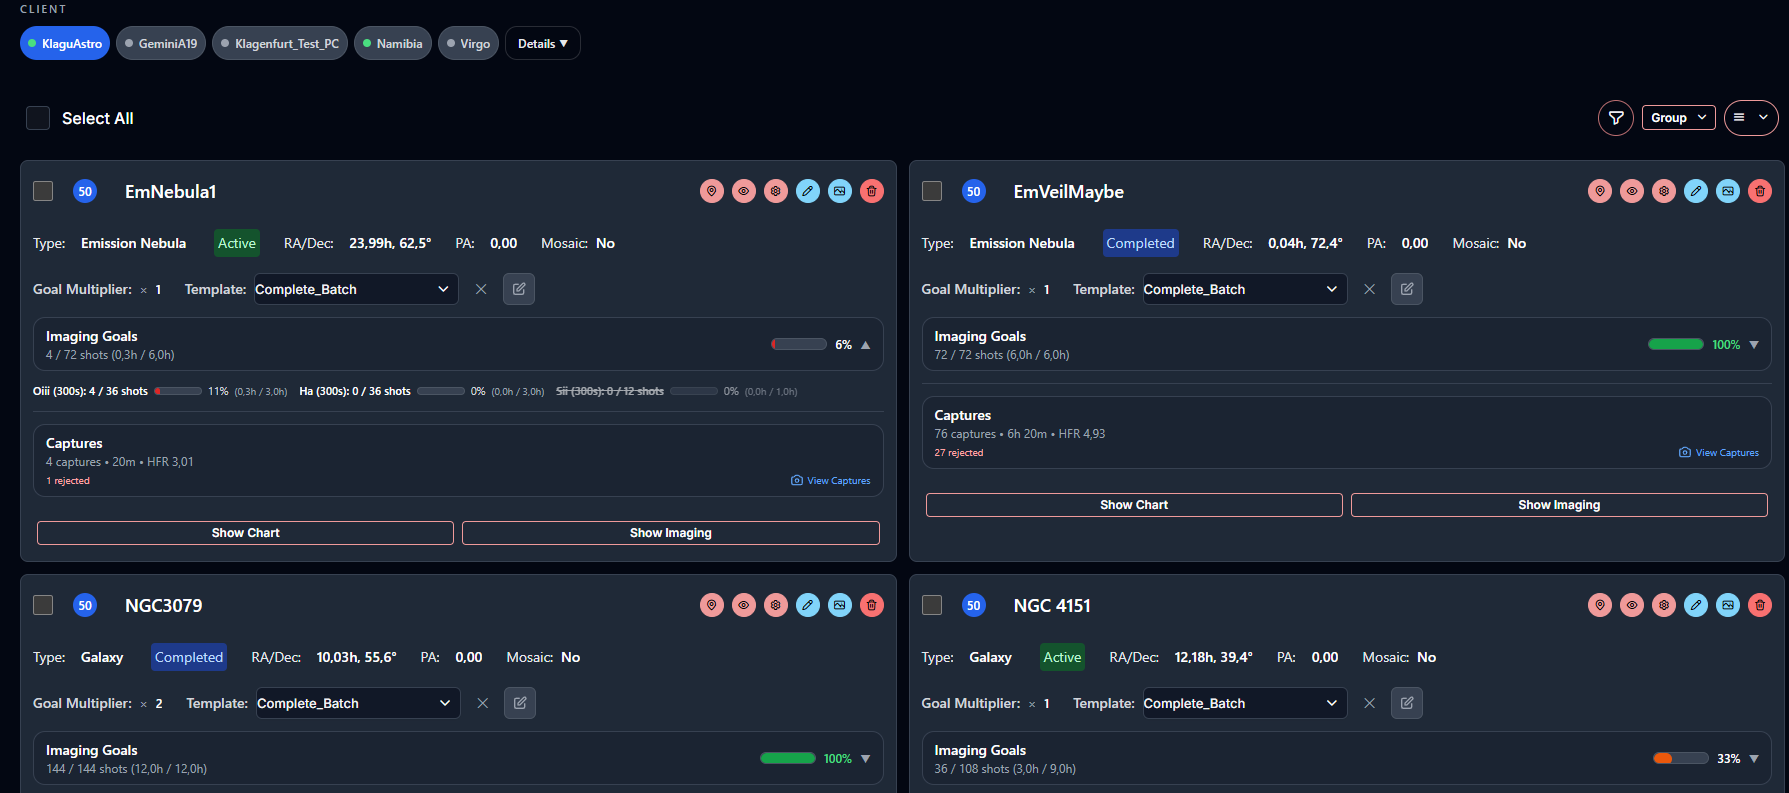
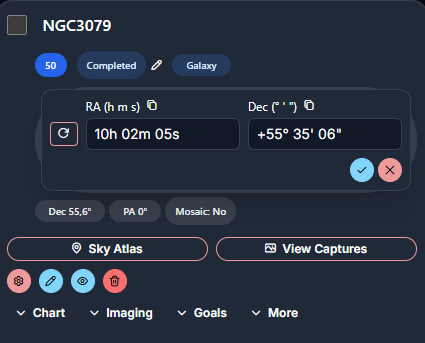
The normal view gives you the standard target cards intended for usage on medium to bigger screens.
The compact view is primarily designed for usage on mobile devices.
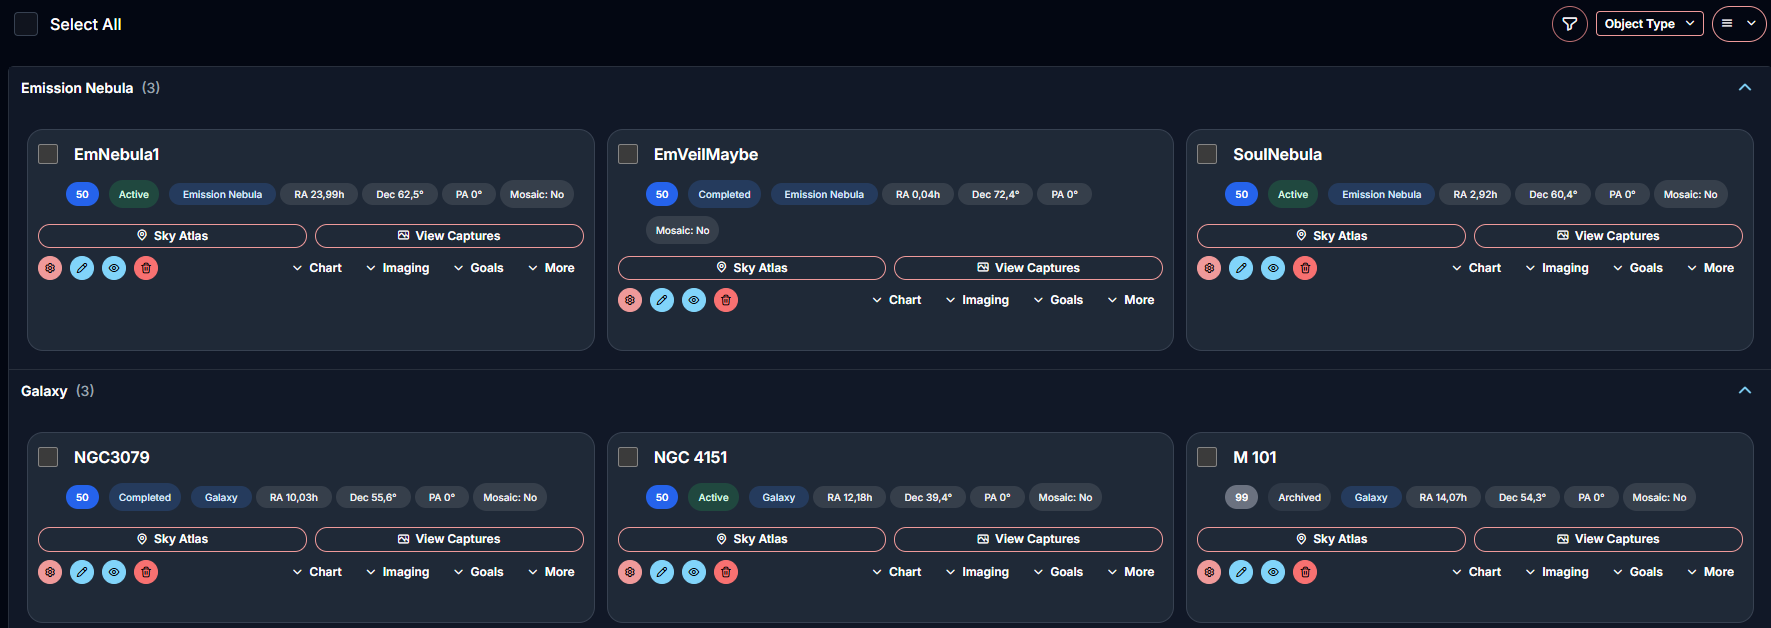
On desktop, AstroManager also offers a tree view that is especially useful if you manage many targets at once.
Target Status
The target status defines how AstroManager should treat the target:
ActiveThe target is available to the scheduler.PausedThe target stays in the list, but AstroManager does not schedule it.CompletedThe target is treated as finished.ArchivedThe target is kept for history and review, but no longer used in normal scheduling.
If you want to keep the progress of a target, do not delete it.
Deleting a target removes the target and its progress permanently. If you want to keep the project history, change the status to Archived instead.
Editing Targets
AstroManager supports two main editing styles.
Inline Quick Edits
The views support quick edits directly from the target list.
Full Edit Dialog
If you need the full target configuration, use the edit button and open the Base Data or Framing & Goals entry.
The dialog Framing & Goals is the main place for:
- target framing
- imaging goals
- mosaic configuration
Change Framing via SkyAtlas
The same dialog also includes Change Framing via SkyAtlas.
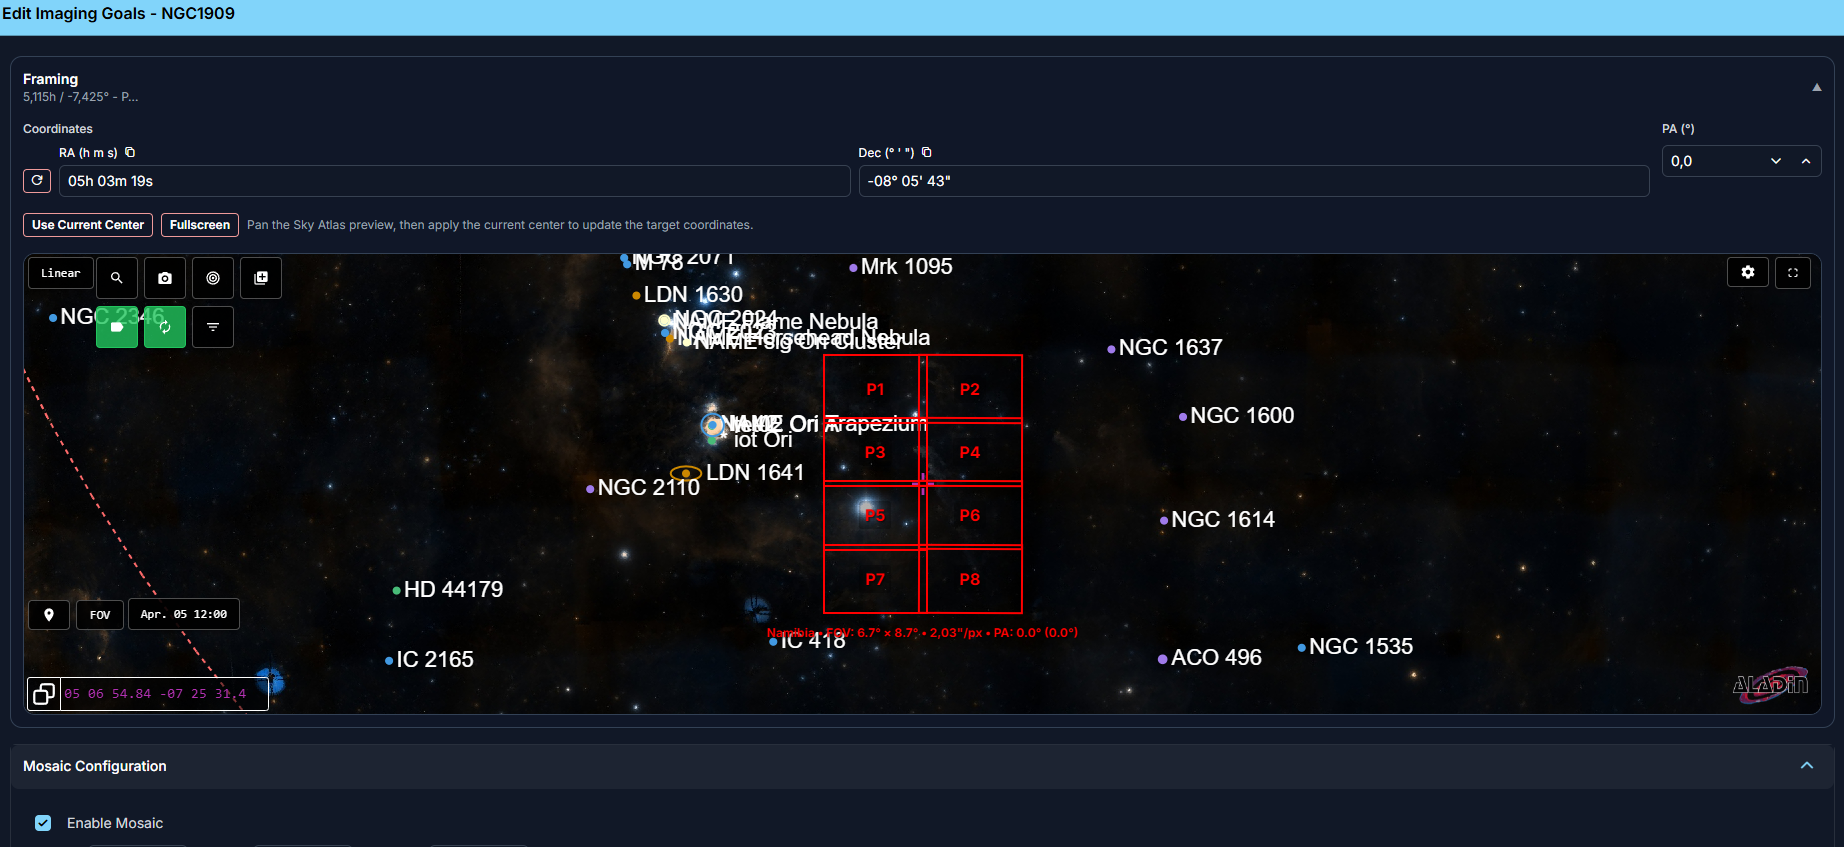
Use this section when you want to refine the target center, adjust the PA, or check how a mosaic layout fits before you save the target.
Use Current Centercopies the current center of the embedded Sky Atlas into the target coordinates.- the
PAfield now also includes a quick slider so you can rotate the framing directly while watching the preview Equipment FOV overlay follows while panninglets you decide whether the overlay stays locked at the saved target framing or follows your current Sky Atlas view while you pan.- Even when the overlay follows while panning, AstroManager does not change the stored target coordinates automatically. The new framing is only applied after you click
Use Current Center. - Changing mosaic settings or using
Use Current Centerkeeps the current Sky Atlas view instead of jumping to a different zoom level.
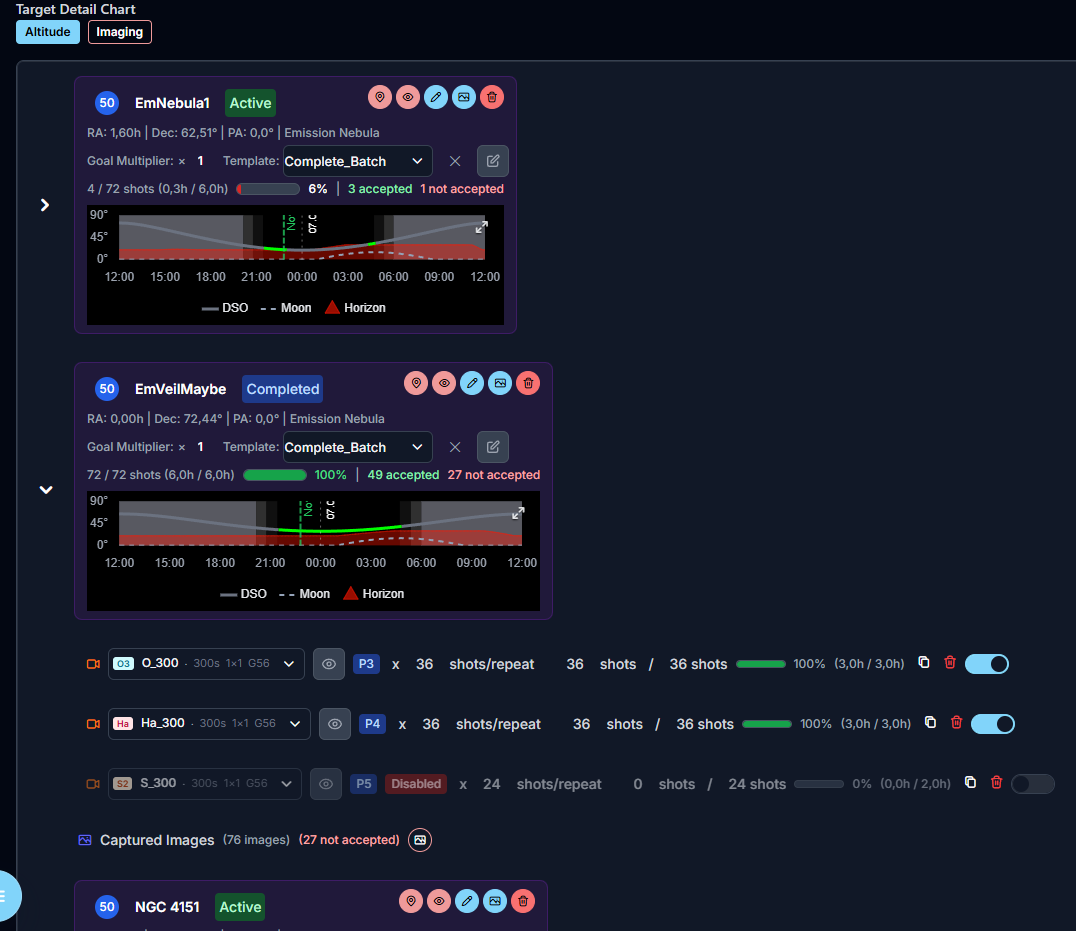
Imaging Goals
Imaging goals define what should be captured for the target.
They are based on Exposure Templates.

Imaging Goal Fields
An imaging goal contains:
- the exposure template
- the target exposure count per batch
- the total target exposure count (= count per batch * goal multiplier of that target)
- the already accepted exposure count (can be overwritten manually)

Imaging Goal Sets
If you reuse the same goal combinations often, you do not need to rebuild them for each new target.
AstroManager supports Imaging Goal Sets, which are reusable presets made from multiple imaging goals.
Typical examples are:
- a standard
LRGBset - a
Ha/OIIInarrowband set - a short broadband starter set for bright objects
You can select an imaging goal set directly in the Add to Targets dialog.
Manage Sets opens the imaging goal set manager for the current setup. There you can:
- create a new set
- edit an existing set
- delete sets you no longer need
Imaging goal sets are setup-aware. When you open them, AstroManager limits the available exposure templates to the current client, observatory, and equipment context so you only pick valid templates for that setup.
Goal Multiplier
The Goal Multiplier helps you scale the base imaging goals of a target without rebuilding them manually.
This is useful when you decide that a target should receive more or less total exposure than originally planned.
Community Sharing
Targets are automatically published into AstroManager's public community area. You can make certain targets private in the community page of that Target.
Inside the target edit dialog, you can mark a target as a Public community target.
For the dedicated docs, see Community Targets and Collaboration Hub.
Mosaic Configuration
AstroManager also fully supports mosaic targets.
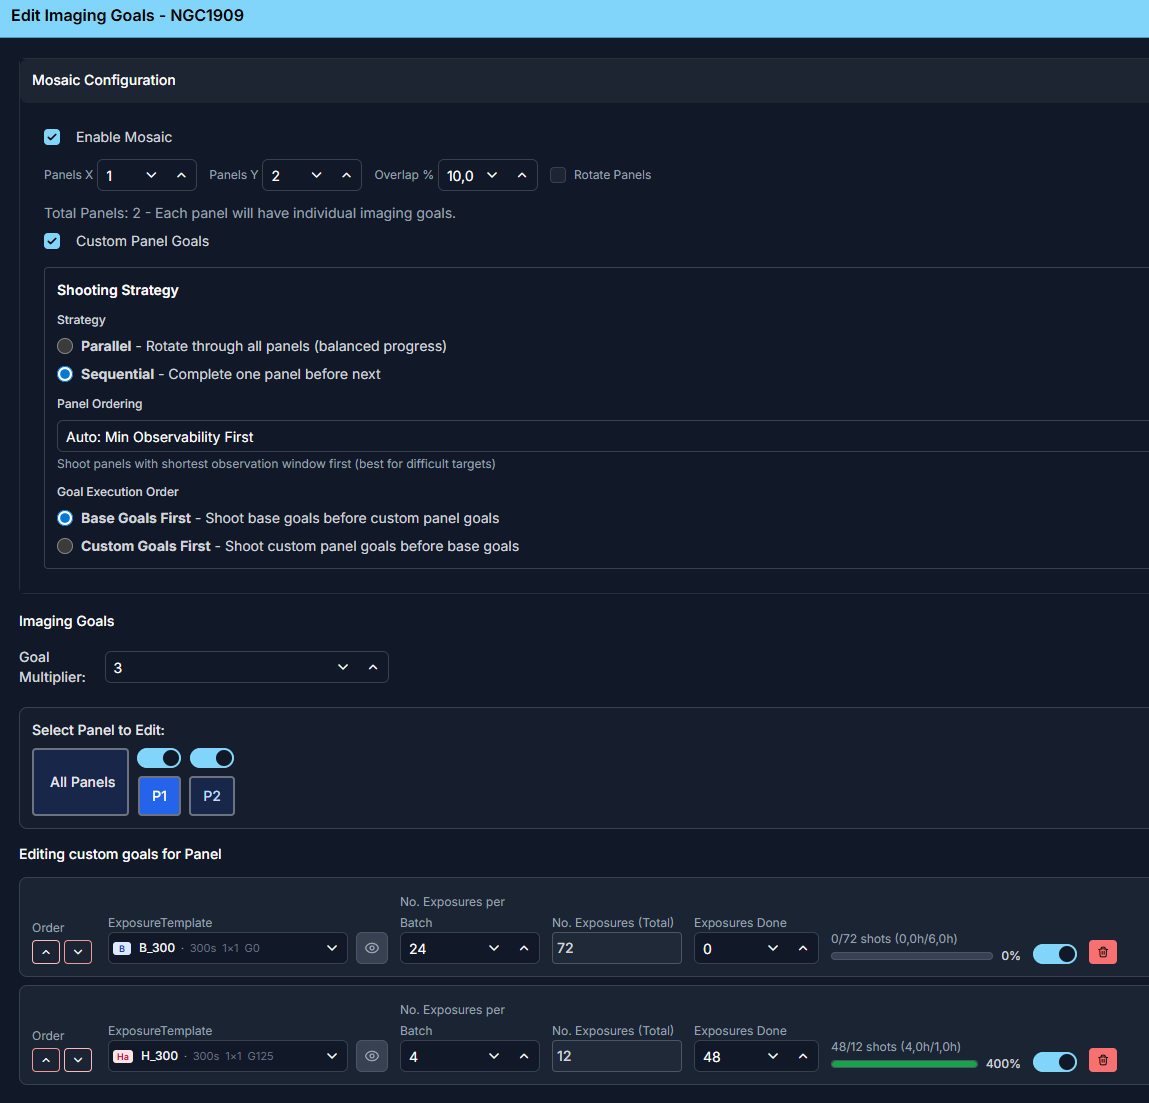
Mosaic Settings
The mosaic configuration controls how AstroManager should split the target into panels.
Typical settings include:
Panel CountDefines how many panels AstroManager should create horizontally and vertically.OverlapDefines how much neighboring panels should overlap to make later registration and processing easier.RotationDefines the overall framing angle of the mosaic.Rotate PanelsLets AstroManager rotate the individual panel layout for better sky alignment. This is especially useful if you have a camera rotator and want the mosaic panels to stay aligned in a more rectangular frame.Shooting StrategyAstroManager currently supports:Parallelto rotate through all panels for balanced progress, andSequentialto complete one panel before moving to the next.Panel OrderingRelevant whenShooting StrategyisSequential. AstroManager supports:Manual Order,Auto: Min Observability First, andAuto: Max Observability First.Custom GoalsDefines whether the target should use only the shared base goals or also panel-specific custom goals.Goal Execution OrderRelevant whenCustom Goalsare enabled. AstroManager supports:Base Goals Firstto shoot the shared goals before panel-specific goals, andCustom Goals Firstto prioritize the panel-specific goals first.
Base Goals vs Custom Goals
For mosaics, AstroManager distinguishes between:
Base GoalsThese are the normal imaging goals of the target and apply to all mosaic panels by default.Custom GoalsThese are panel-specific goals that overwrite the shared plan for a specific panel, for example if only some panels should receive additionalHaexposure time.
This lets you keep the normal case simple while still supporting special panels that need a different exposure plan.
Good To Know
- Targets can be opened directly in Sky Atlas with the assigned equipment field of view already overlaid.
- If you want, you can assign an AstroBin image as background reference for the target.
- Grouping and tree view help a lot once you manage many active targets for the same client.